Table Editor
Using the Table Editor
Table Editor
The Table Editor is a critical view in Atlas. Using the Table Editor, you can change calibration lookup tables and modify ECU behaviors resulting from their computed values. Most, if not all, recalibration done on your ECU will happen from within the Table Editor, so it is crucial to understand its capabilities and how to navigate around it.
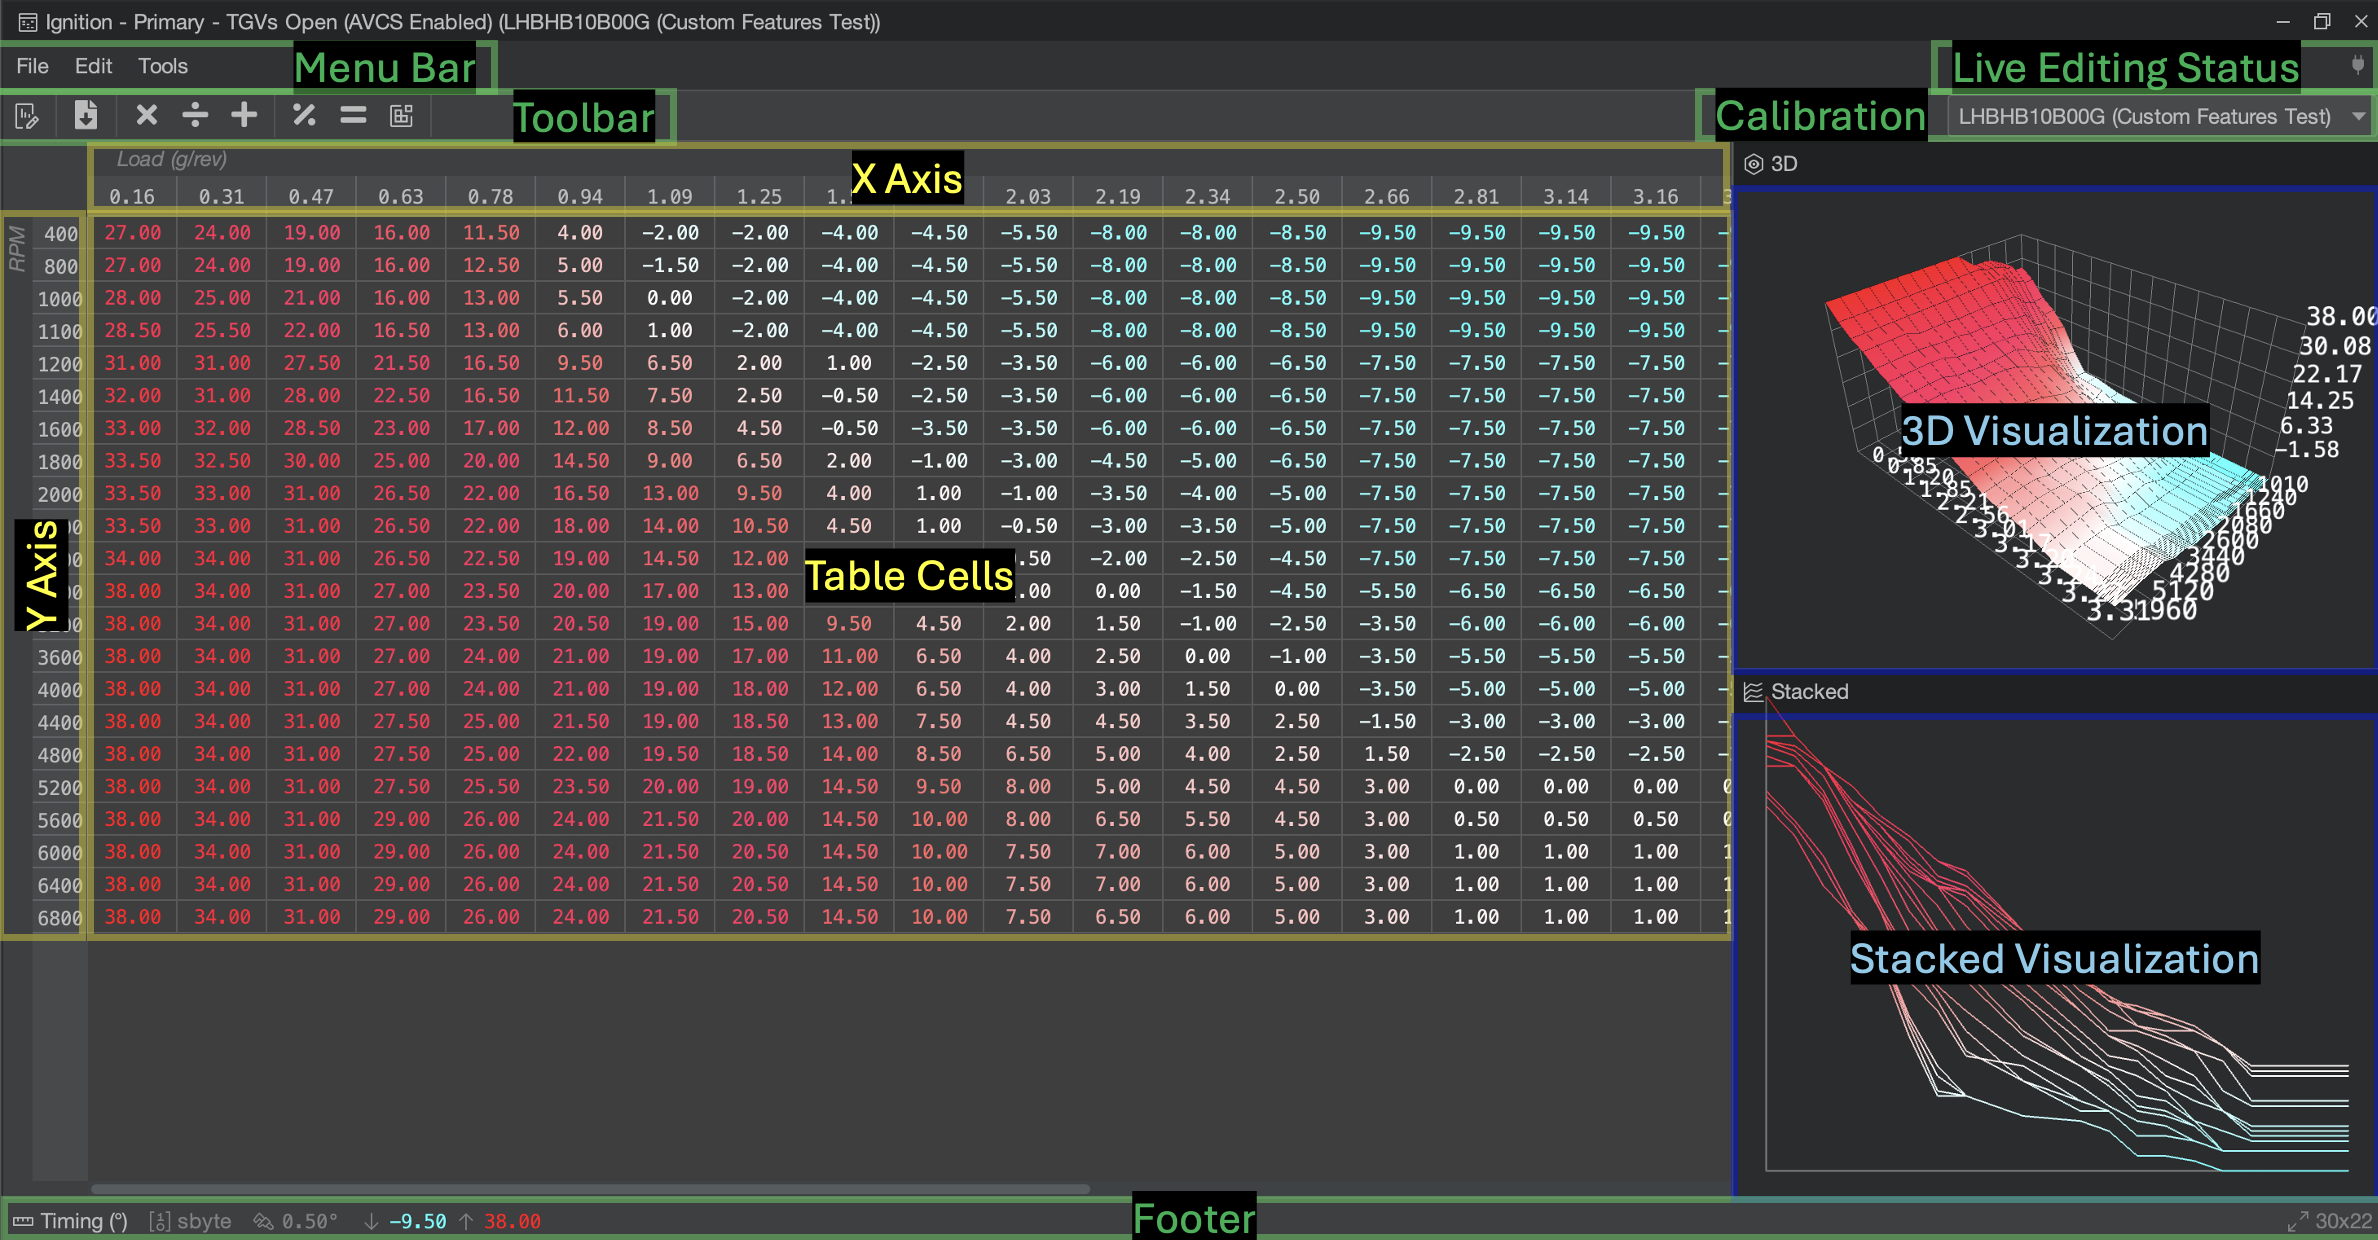
Menu Bar
The Live Editing Status Area on the right-hand side of the Menu Bar shows you the current state of live editing in the Table Editor. If a red "LIVE" box appears, then any changes you make in the Table Editor will be immediately reflected on the ECU, so be careful when making changes. Sometimes, you might see a yellow "Resync" label. Click this label to redownload the ECU's table copy so you can return to a LIVE session, but beware: any local changes will be lost.
For more information and diagnostics on Live Editing, see the documentation page:
Toolbar
The Toolbar has a series of quick actions that you can perform such as exporting the table data, and performing mathematical operations on selected cells, such as adding values or averaging them.
The Calibration Area on the right-hand side of the Toolbar allows you to quickly change the Table Editor between different calibrations in your project. Most of the time, you only want to edit Global Calibration, which has its own dropdown in the Atlas Toolbar outside the Table Editor in the main Atlas window. However, you can change each Table Editor independently as you work.
Keep in mind that when the Global Calibration changes, any Table Editors that are currently selected to that calibration will also update to the newly selected Global Calibration. Any Table Editors that have selected a different calibration than the Global Calibration will not track the Atlas Global Calibration as it changes, unless the Global Calibration being changed from agrees with the Table Editor's calibration.
Table Area
X Axis / Y Axis
The axes for the table are listed alongside the table contents and scroll with the table cell data as you pan/scroll through it. Right-click on an axis's header to edit its contents. Be very careful! Atlas will allow you to edit any Axis, even if it might be dangerous. Editing axes can cause unintended behavior in the ECU; we recommend double-checking with our community (i.e. Discord) before editing axis data in your ECU, unless you know what you're doing.
Table Cells
The Table Cells for the table is the large area in the center of the Table Editor. In this area, you can perform several actions and modify table cell data unless the currently selected calibration is marked as read-only.
When Table Cells change, they will flash a certain color depending on what has been updated. Cells flash yellow when they have updated the calibration (or "ROM") only, as in the case with offline work, but flash green when the data has also been updated on the online ECU in a live session.
| Action | Keystroke(s) | Description |
| Enter Cell Data | Type any number | Enter cell data by first selecting cells you want to edit, then type a number and press Enter/Return to have the entire selection update to the entered value. |
| Undo | Ctrl+Z (Cmd+Z) | Undo the last edit. |
| Redo |
Ctrl+Y (Cmd+Y) | Redo the last undone edit. |
| Add |
Shift+(+) | Type the "+" character (Shift and the "+" key together) to start adding a value to the current selection. Tip: use a negative number to quickly subtract a value. |
| Multiply | Shift+8 | Type the "*" character (Shift and the "8" key together) to start multiplying the current selection by a coefficient. |
| Divide | / | Type the "/" character to start dividing the current selection by a coefficient. |
| Interpolate | i |
Type the "i" key to immediately interpolate the current complex selection. Interpolation behaves differently than other actions. Selected cells will be treated as anchors and will be unchanged, but any cells in between the anchors will be interpolated according to the Table Editor's current interpolation algorithm. |
Selection in the Table Editor can either be Simple or Complex. The following table breaks down these two selection modes:
| Simple Selection | Complex Selection |
|
Click and drag to make a simple selection. Use Ctrl/Cmd + A together to quickly select the entire table. |
Start with a simple selection (or one cell), and hold Ctrl/Cmd while clicking other areas of the table to produce a complex selection. Complex selections are a key feature with Interpolation. |
|
|
|
Interpolation
Interpolation in the Table Editor
Interpolation is a feature in Atlas that allows you to effectively smooth table cell data. Using interpolation, you can create gradients that prevent the ECU from suddenly "jumping" in values, helping to avoid detonation and create a smoother driver experience across a map.
Interpolation relies on Complex Selections for more advanced calibration editing. Due to the internal algorithm being based on complex selections, Interpolation enables you to quickly design a map in fewer interactions with the editor and speeds up your workflow.
Basics
Horizontal/Vertical Smoothing
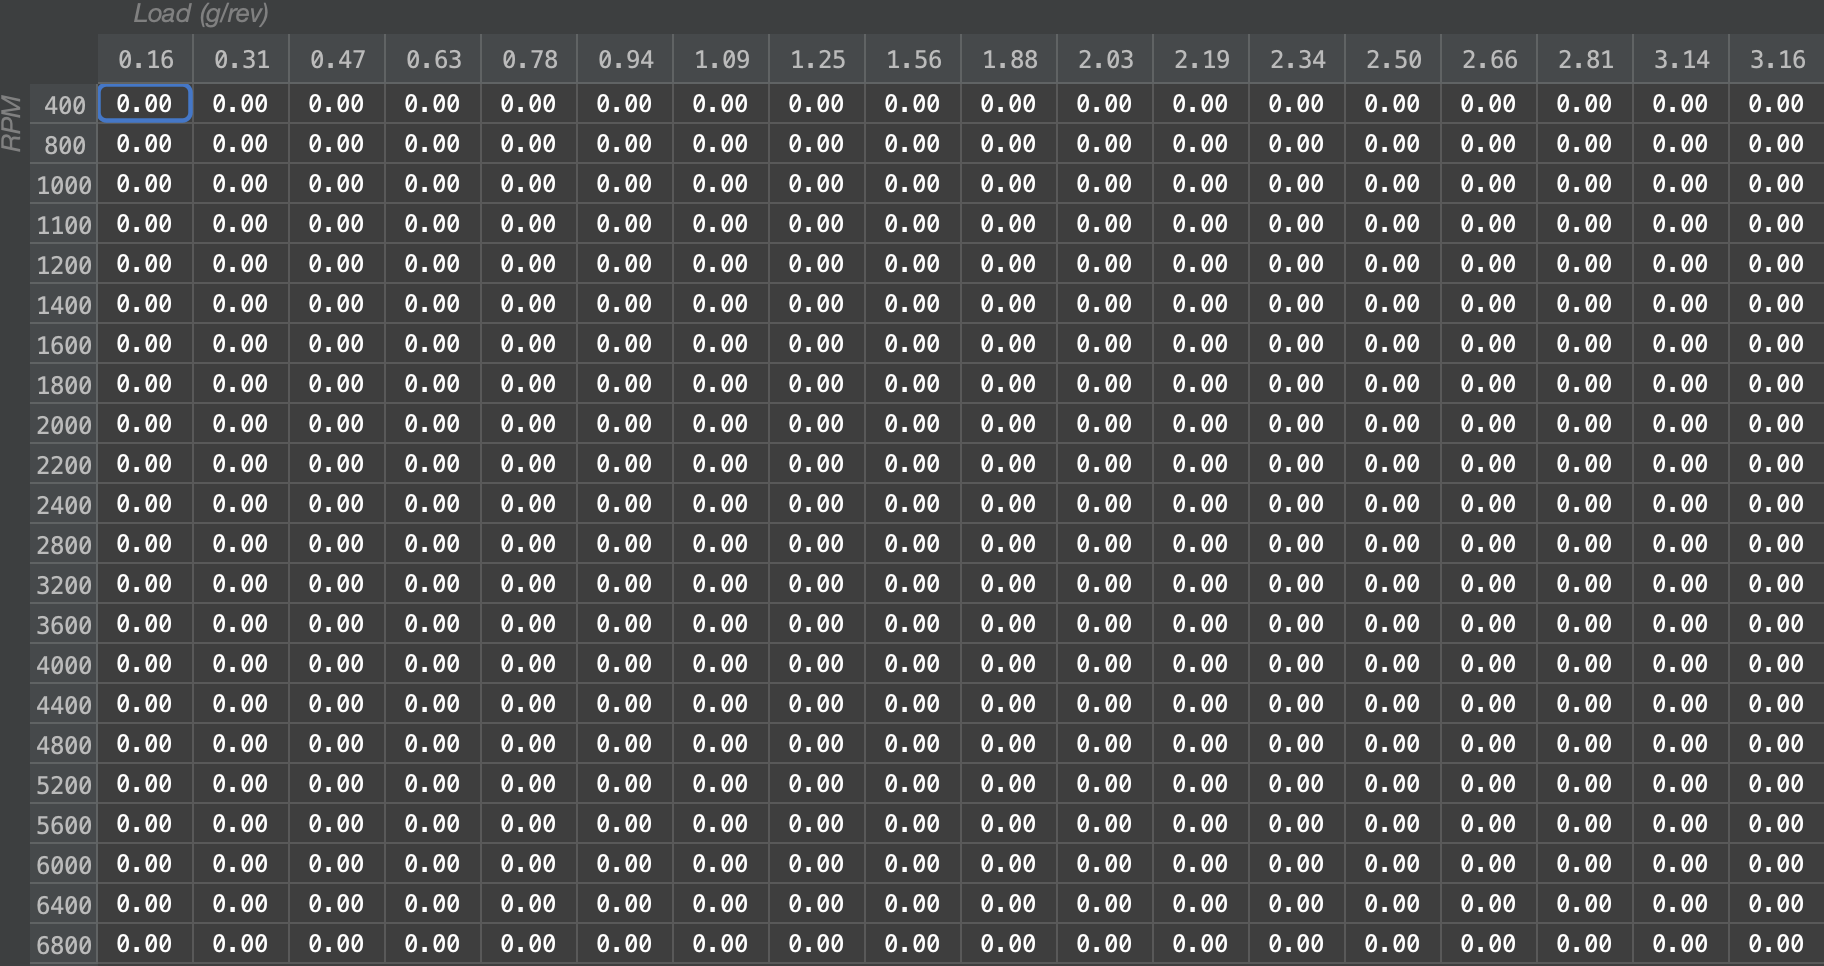
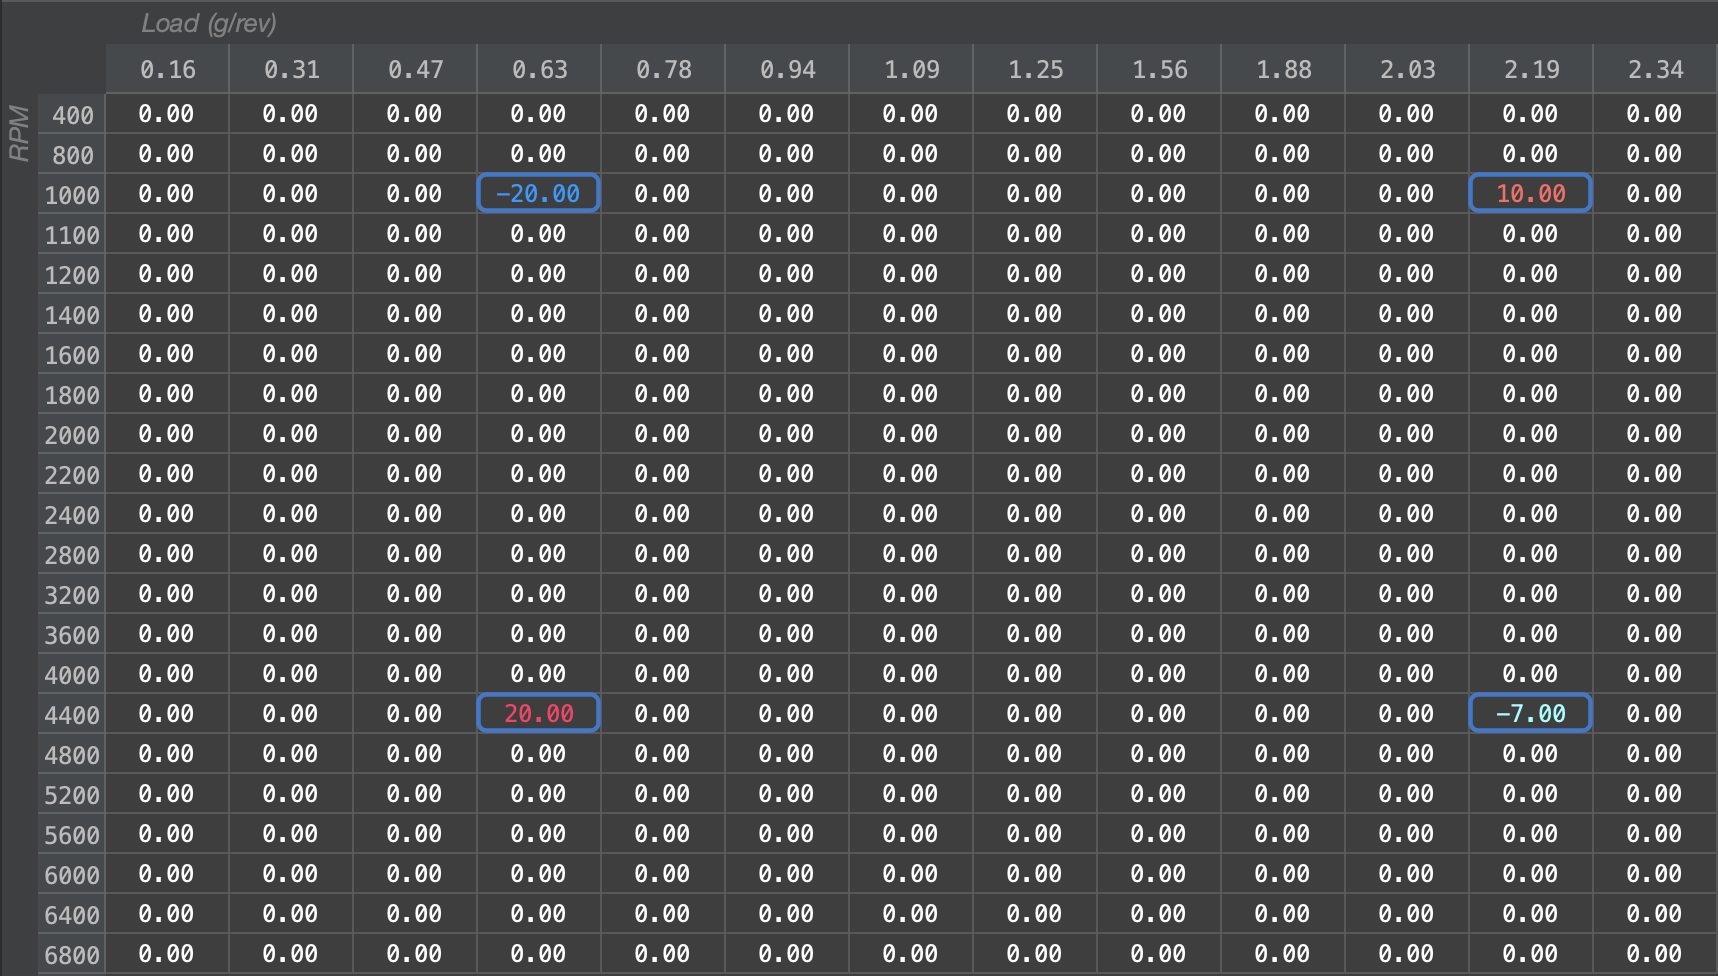
Take the following table as an example, it is an ignition timing table will all values set to 0:
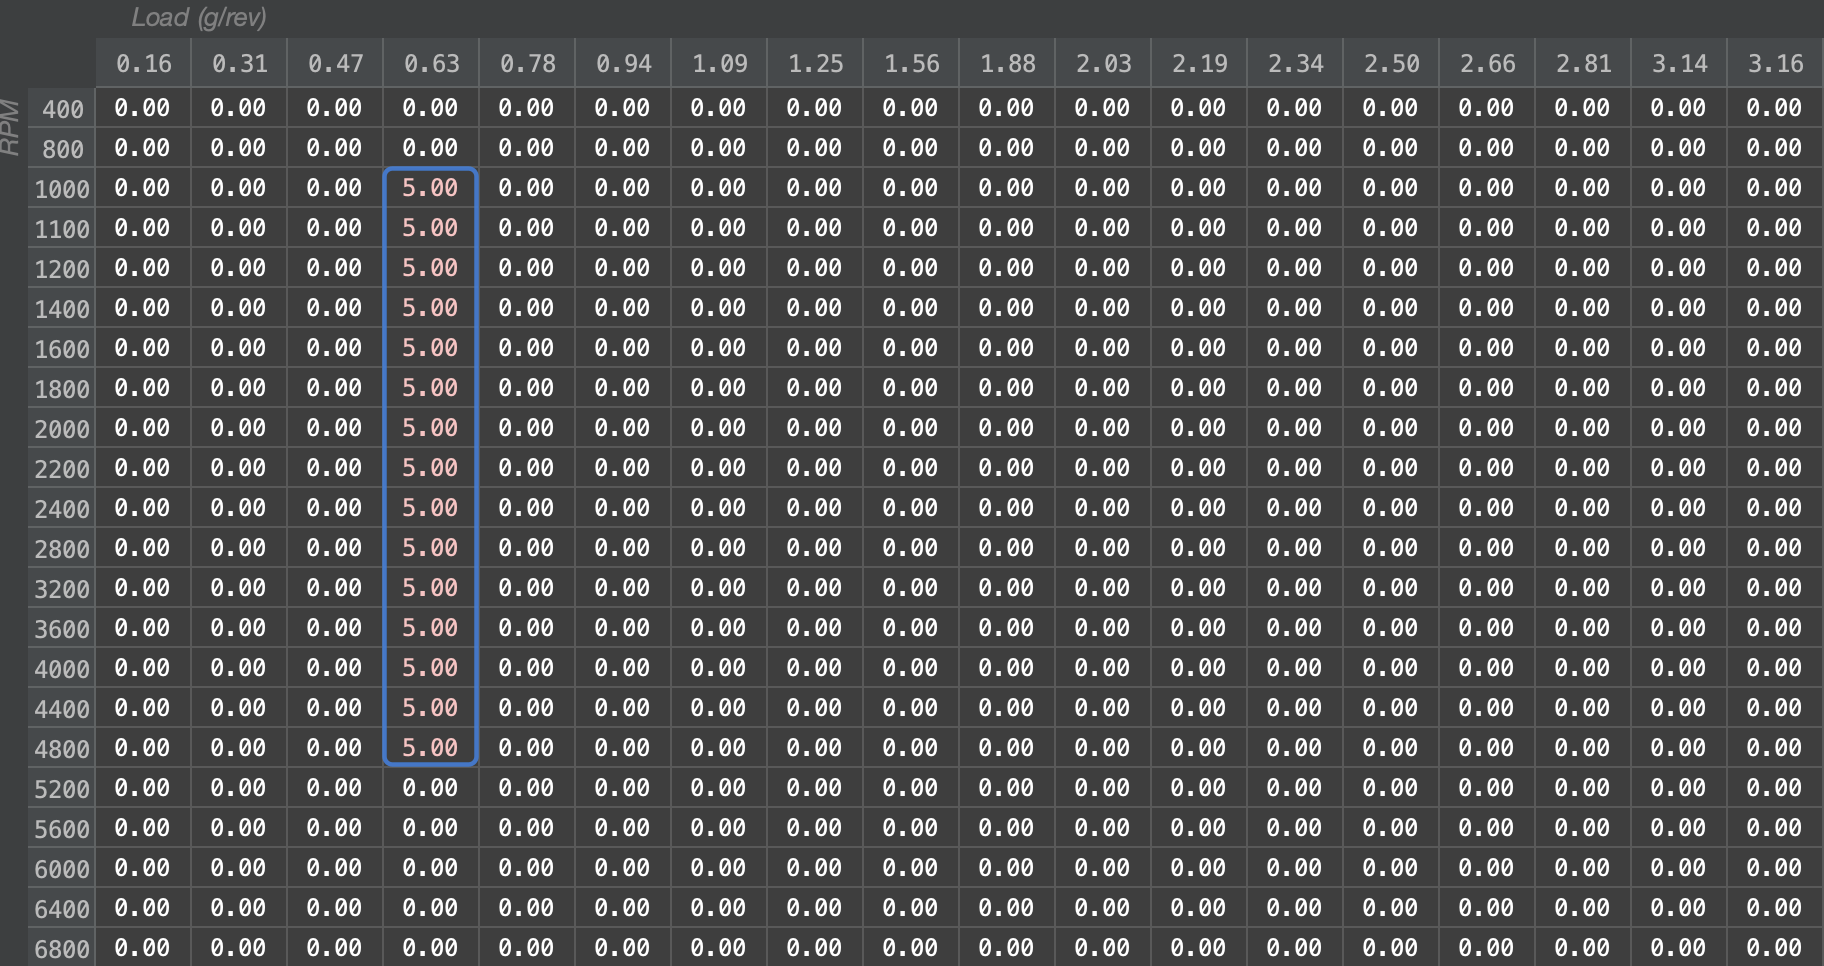
Let's begin by selecting an area of the table and setting the values to 5 degrees:
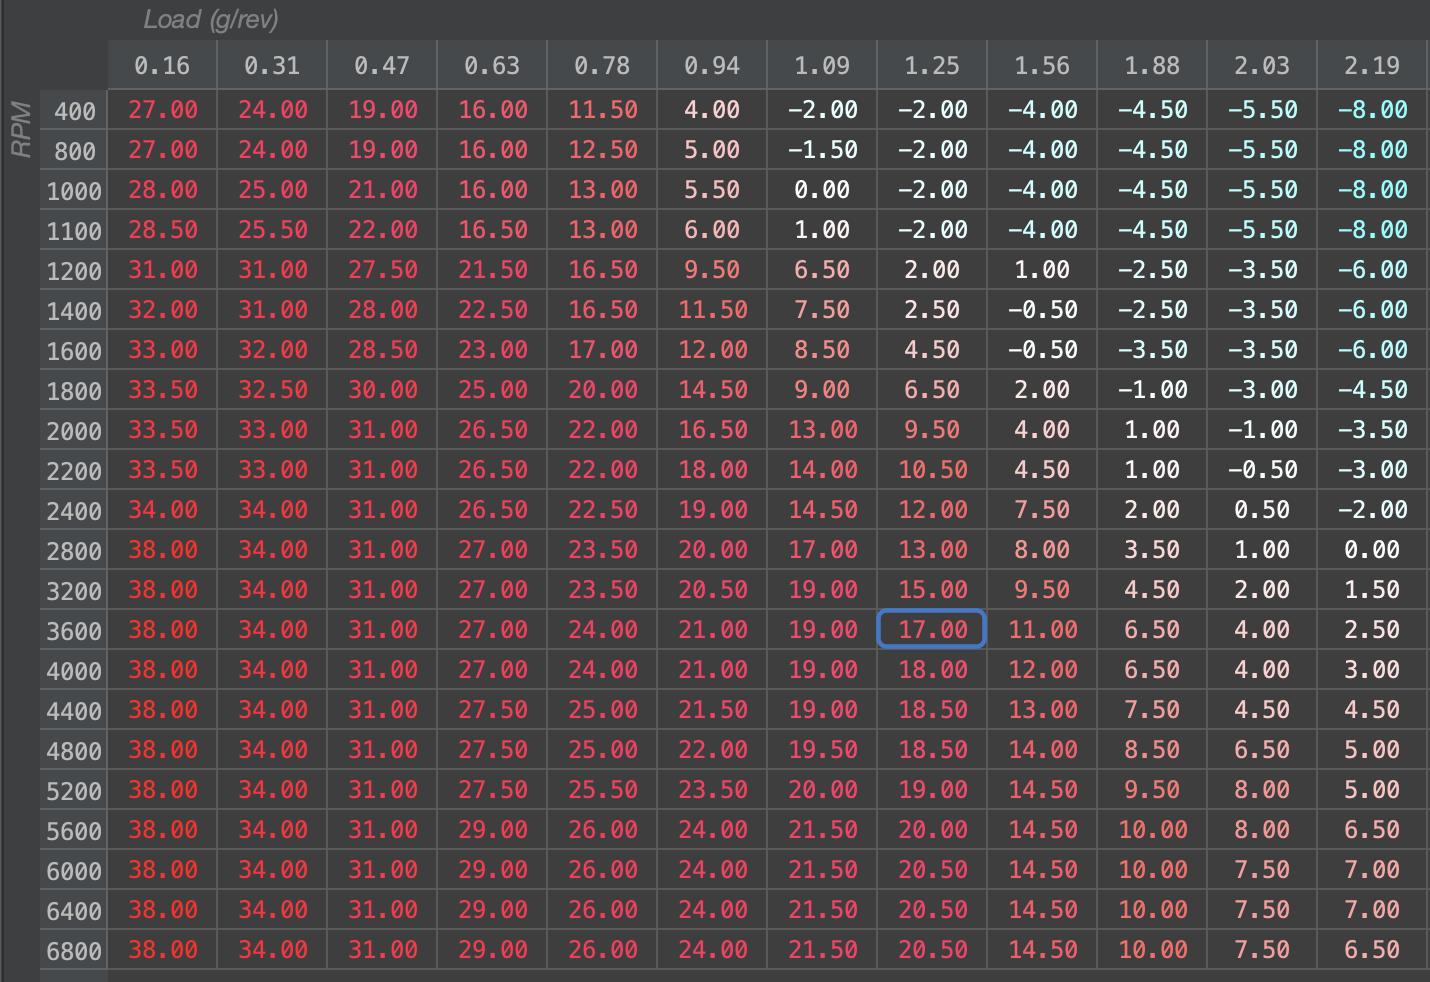
Holding down the Ctrl/Cmd key on our keyboard, we will click on another cell, such as 2.34g/rev x 2000RPM:
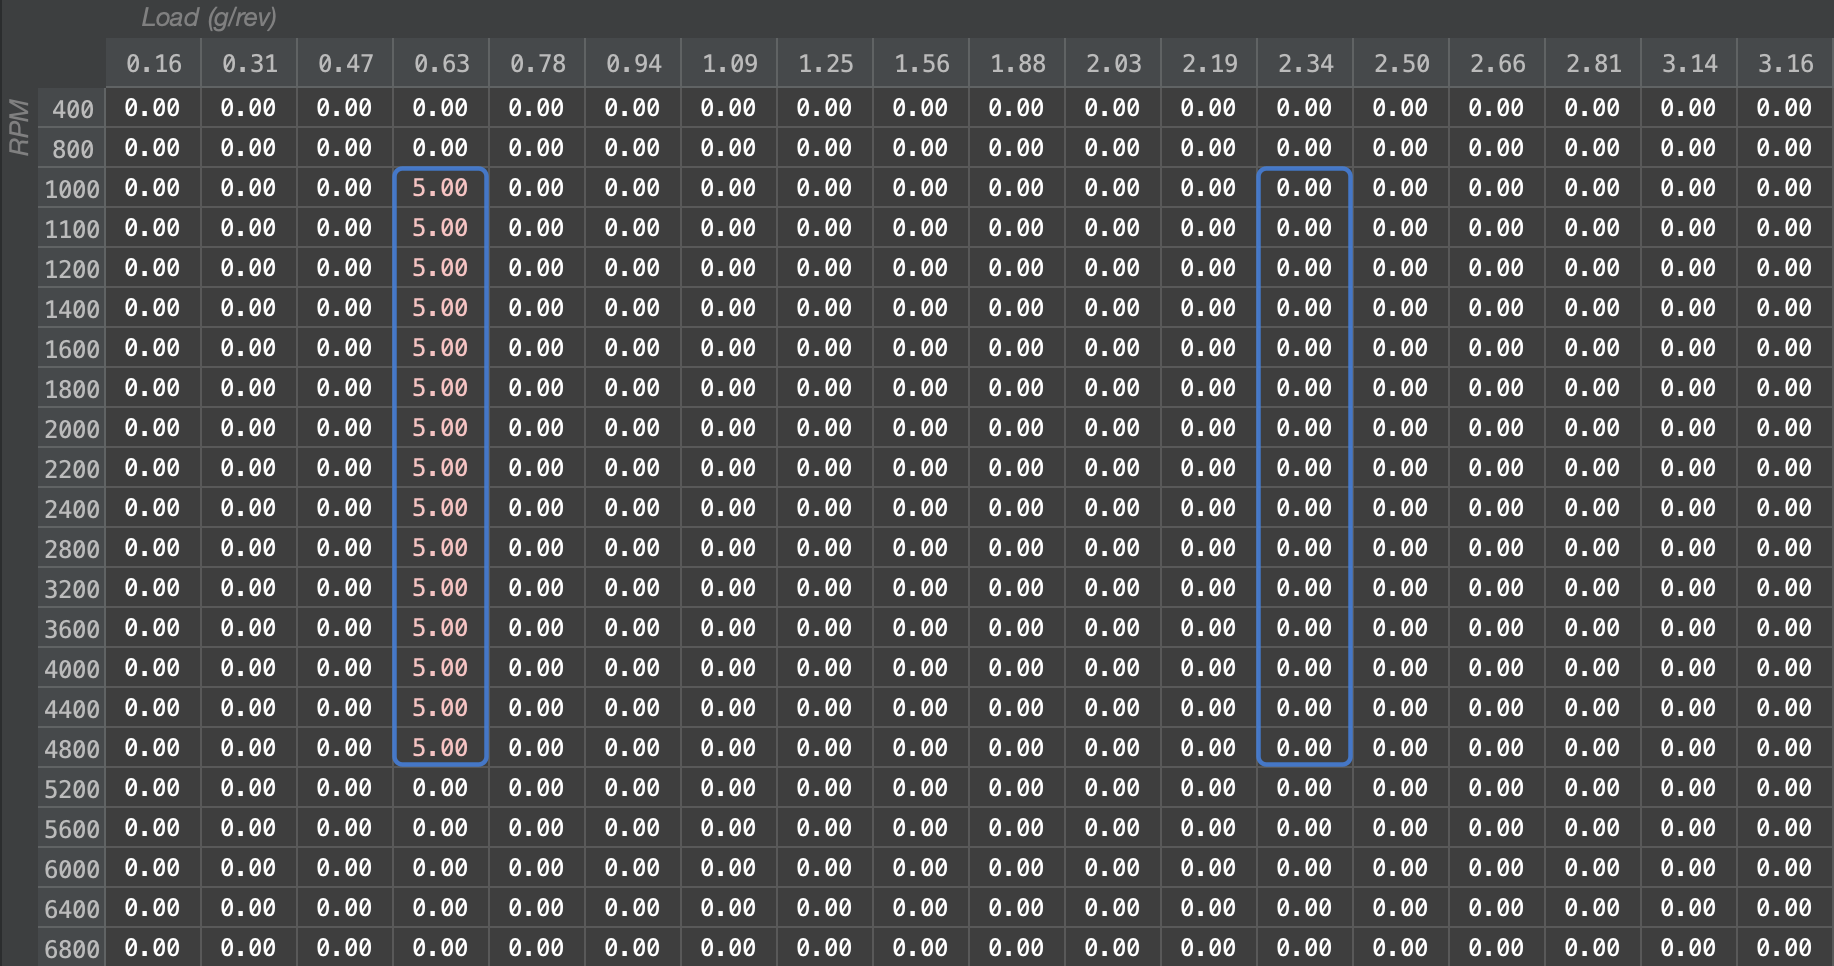
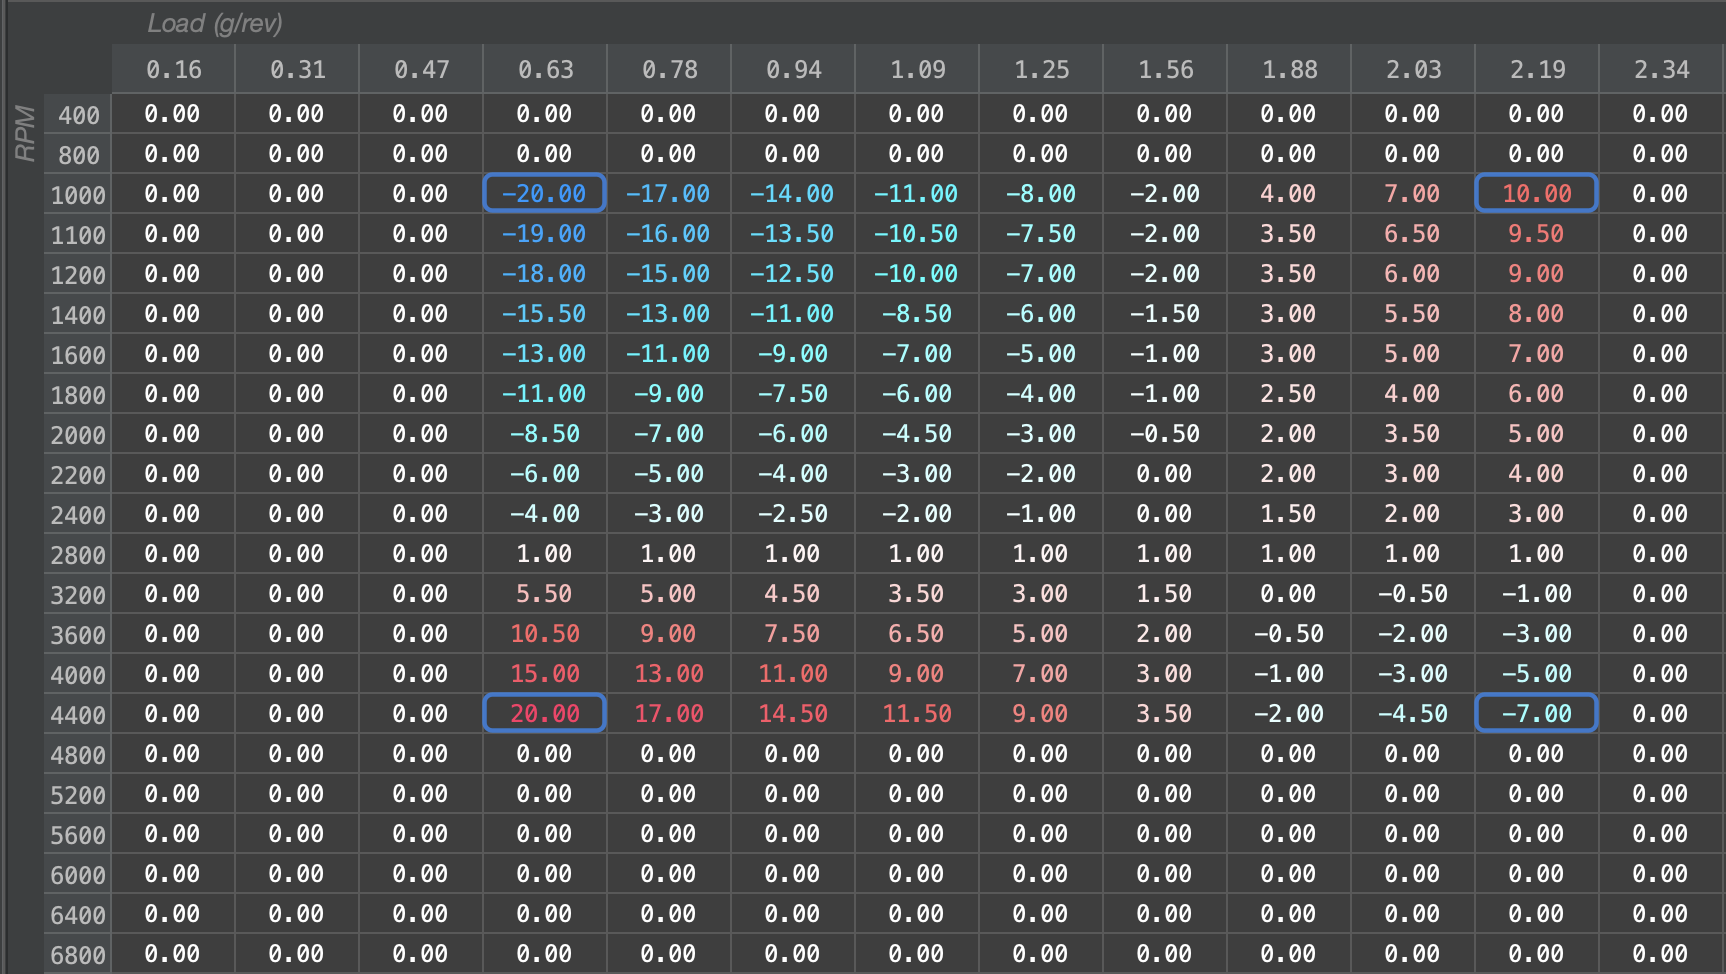
A Complex Selection has now been started. As you can see, a duplicate-sized column has now been selected in the area we clicked. Now, press the "i" key on the keyboard to immediately interpolate the empty space between the two highlighted columns:
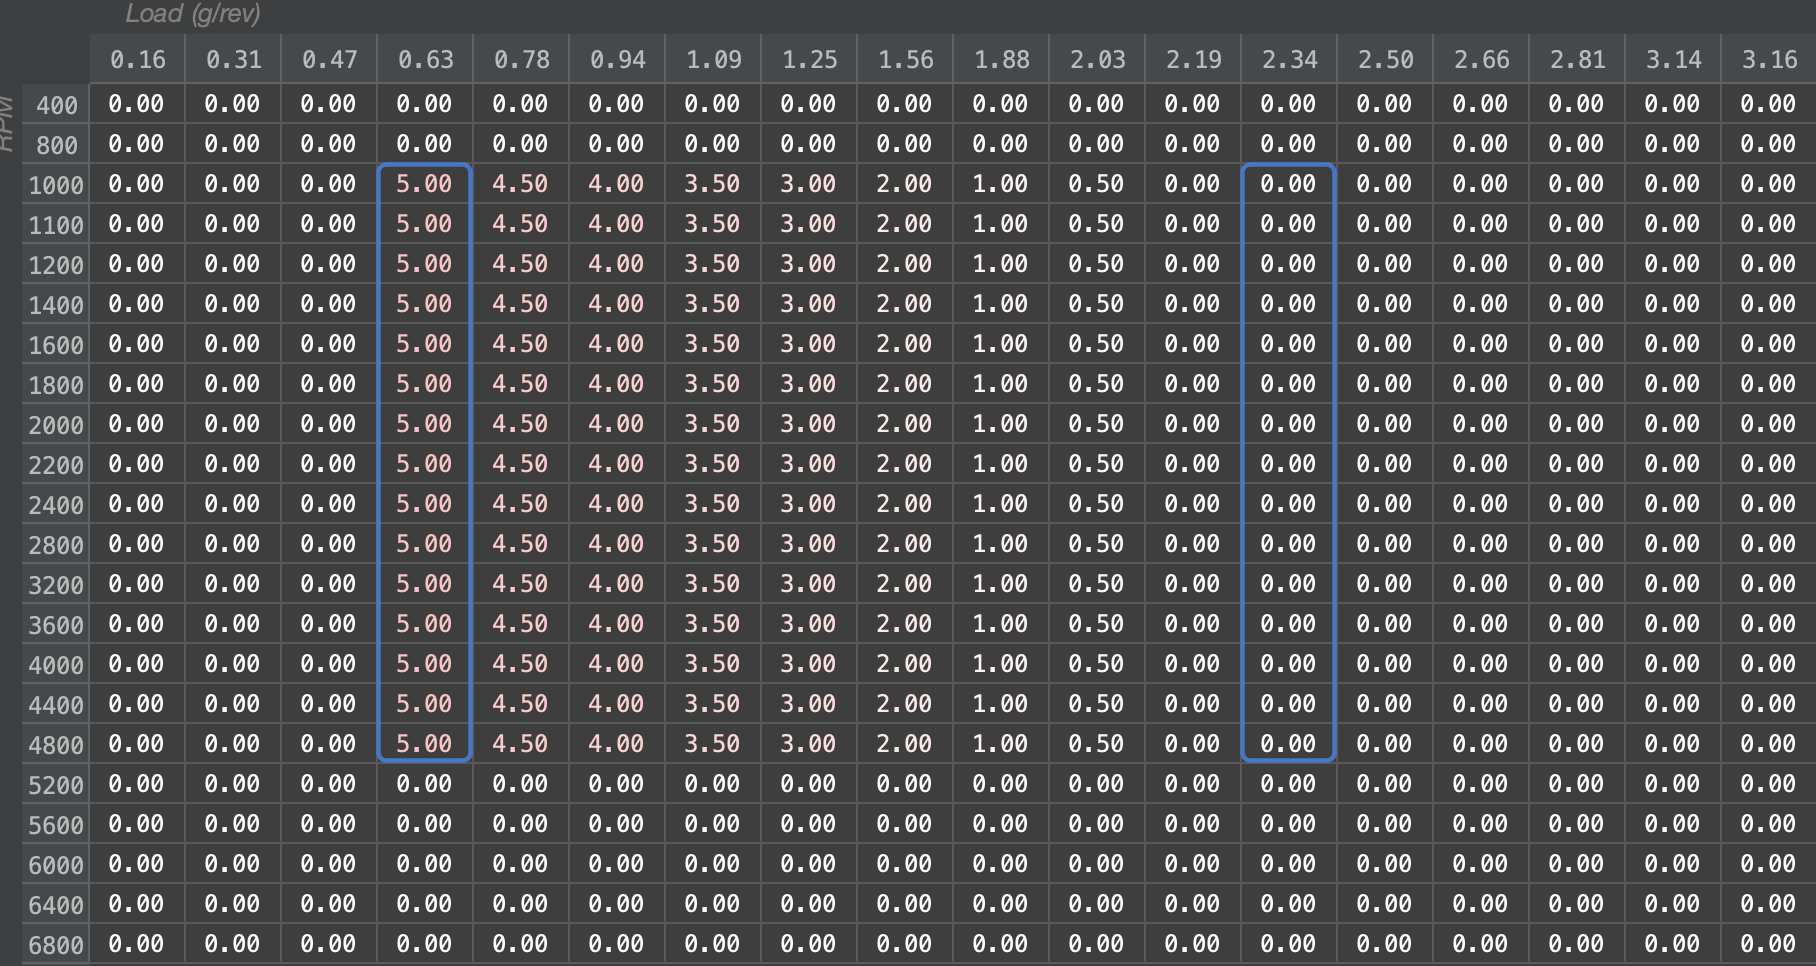
As we can see, the table has been interpolated in the empty space, smoothing from 5.00 degrees to 0.00 degrees. The highlighted columns did not change, as they are treated as anchors in the interpolation algorithm.
Corner-Based Interpolation
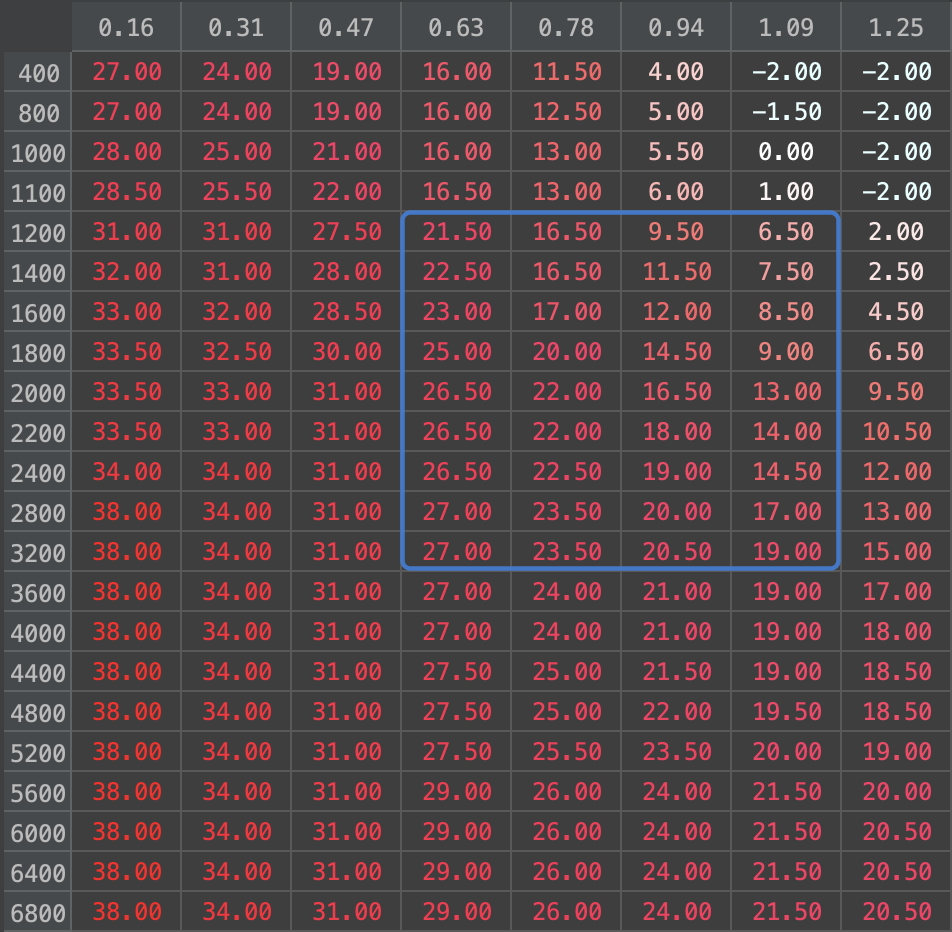
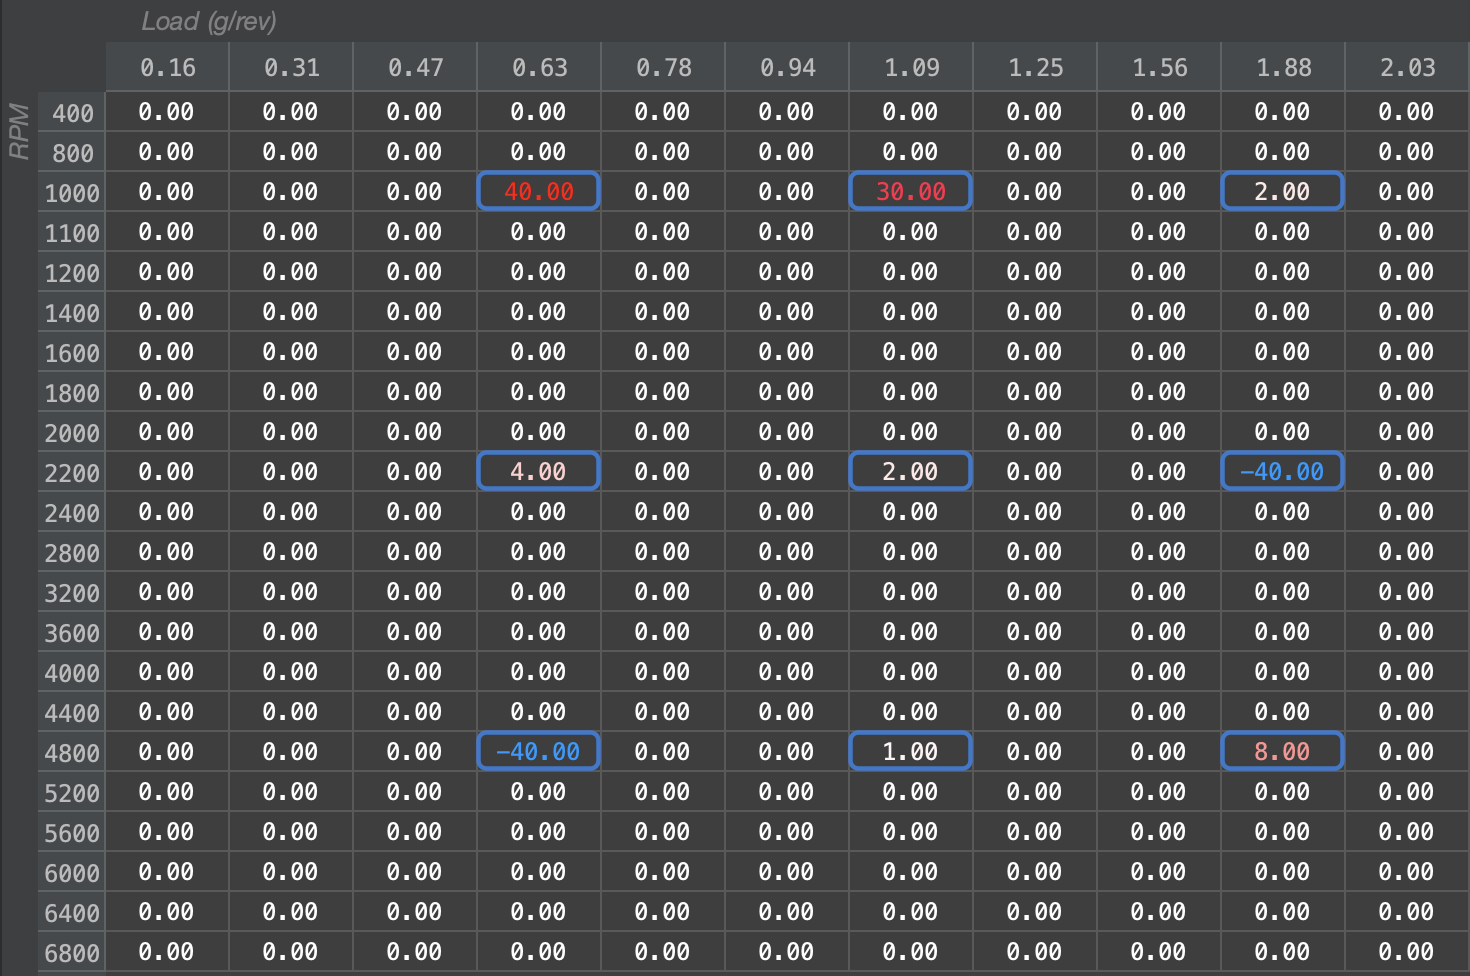
A typical use-case for interpolation is interpolating corners of a table. In this example, we'll interpolate 4 corners and create a blended map between them.
Selecting the 4 corners desired for interpolation by holding the Ctrl/Cmd key and clicking on each anchor of the area to interpolate, press the "i" key to immediately interpolate the area of the box using the anchors as waypoints for the operation:
Advanced
Smoothing with a Waypoint
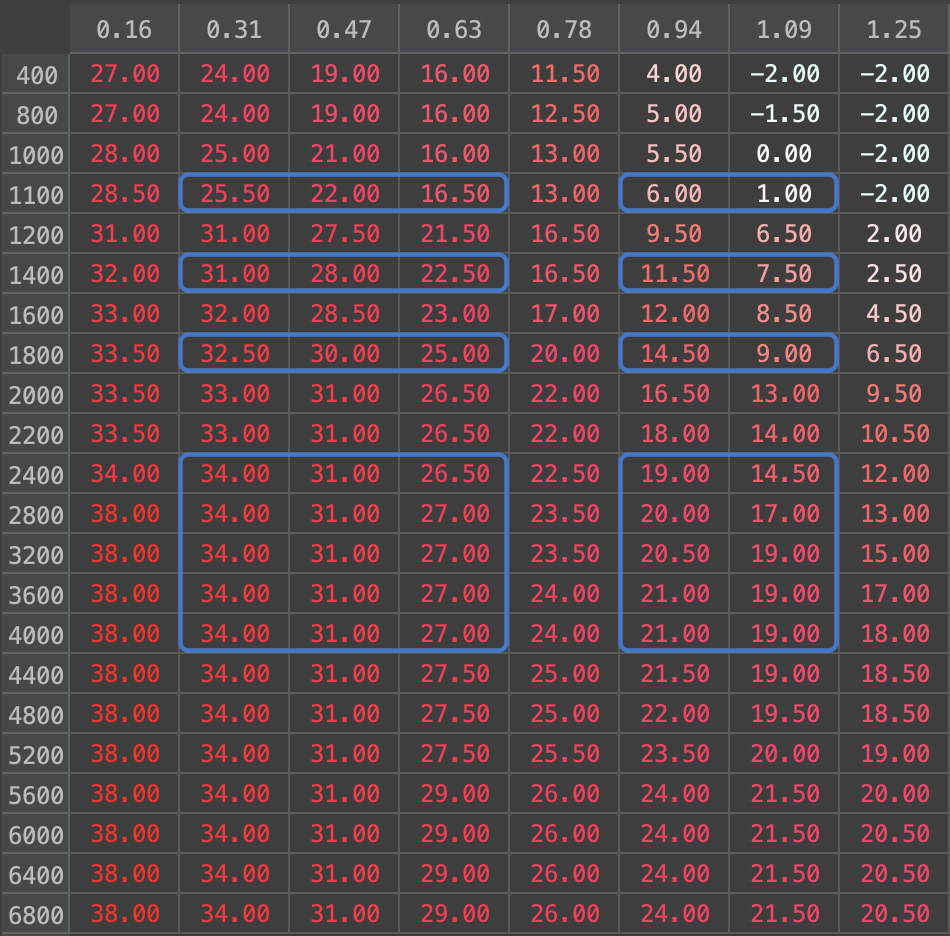
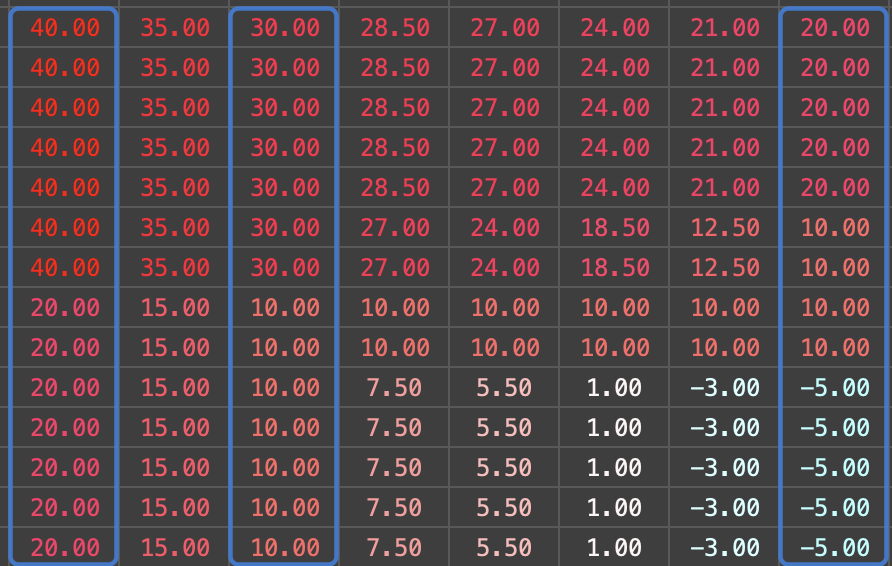
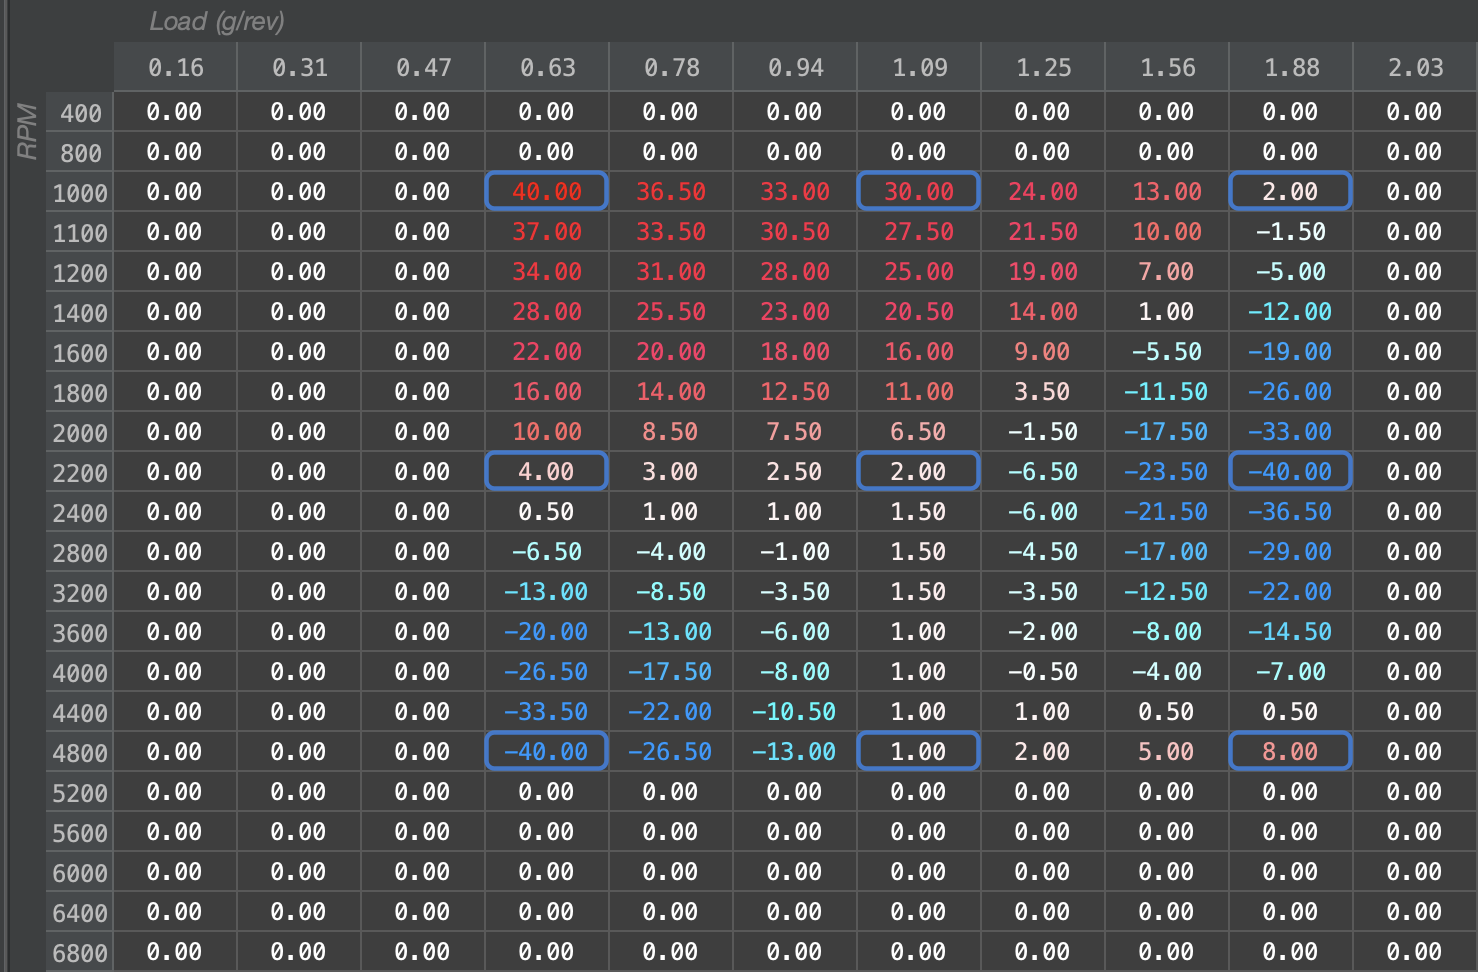
By selecting multiple columns (or rows), we can create a way-pointed interpolation. The values under the 0.94 g/rev column will be unchanged, and will instead be used to interpolate the values to the left and right as they approach the other anchors at 0.63 g/rev and 2.03 g/rev.

Multiple Waypoints
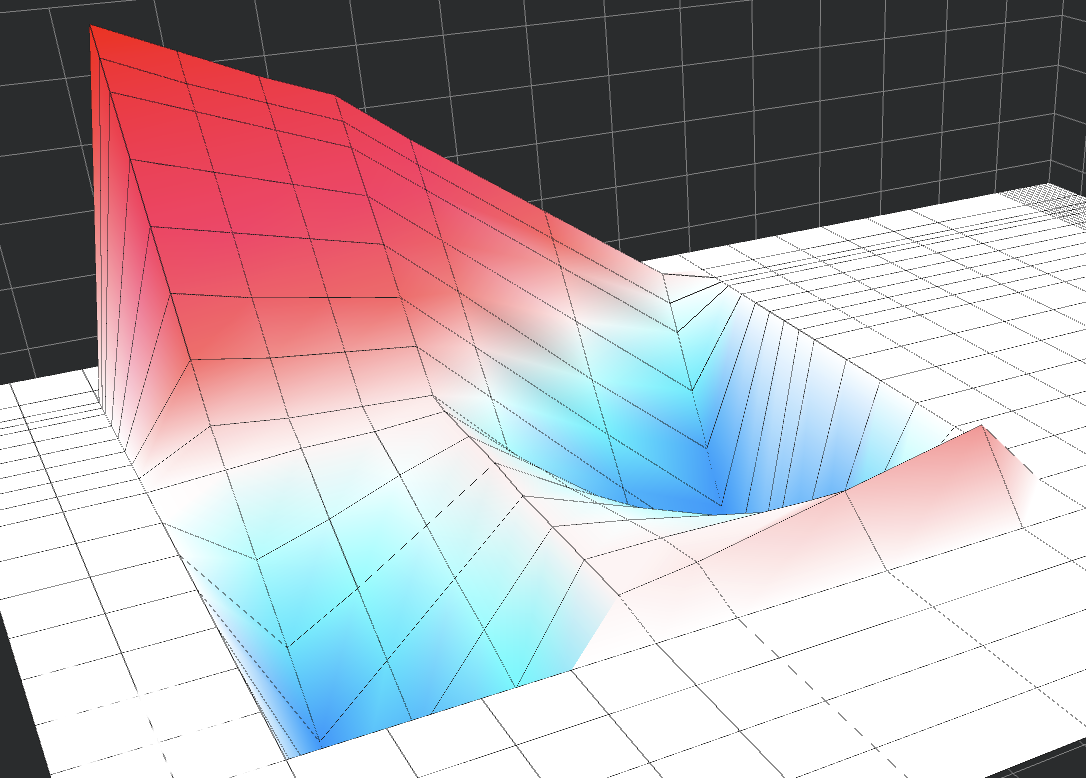
In a very common scenario, you may want to create a map from a series of waypoints as shown. In this example, we select each cell using the Cmd/Ctrl key and use the "i" key to quickly interpolate between each of the waypoints.
Reverting to Another Calibration
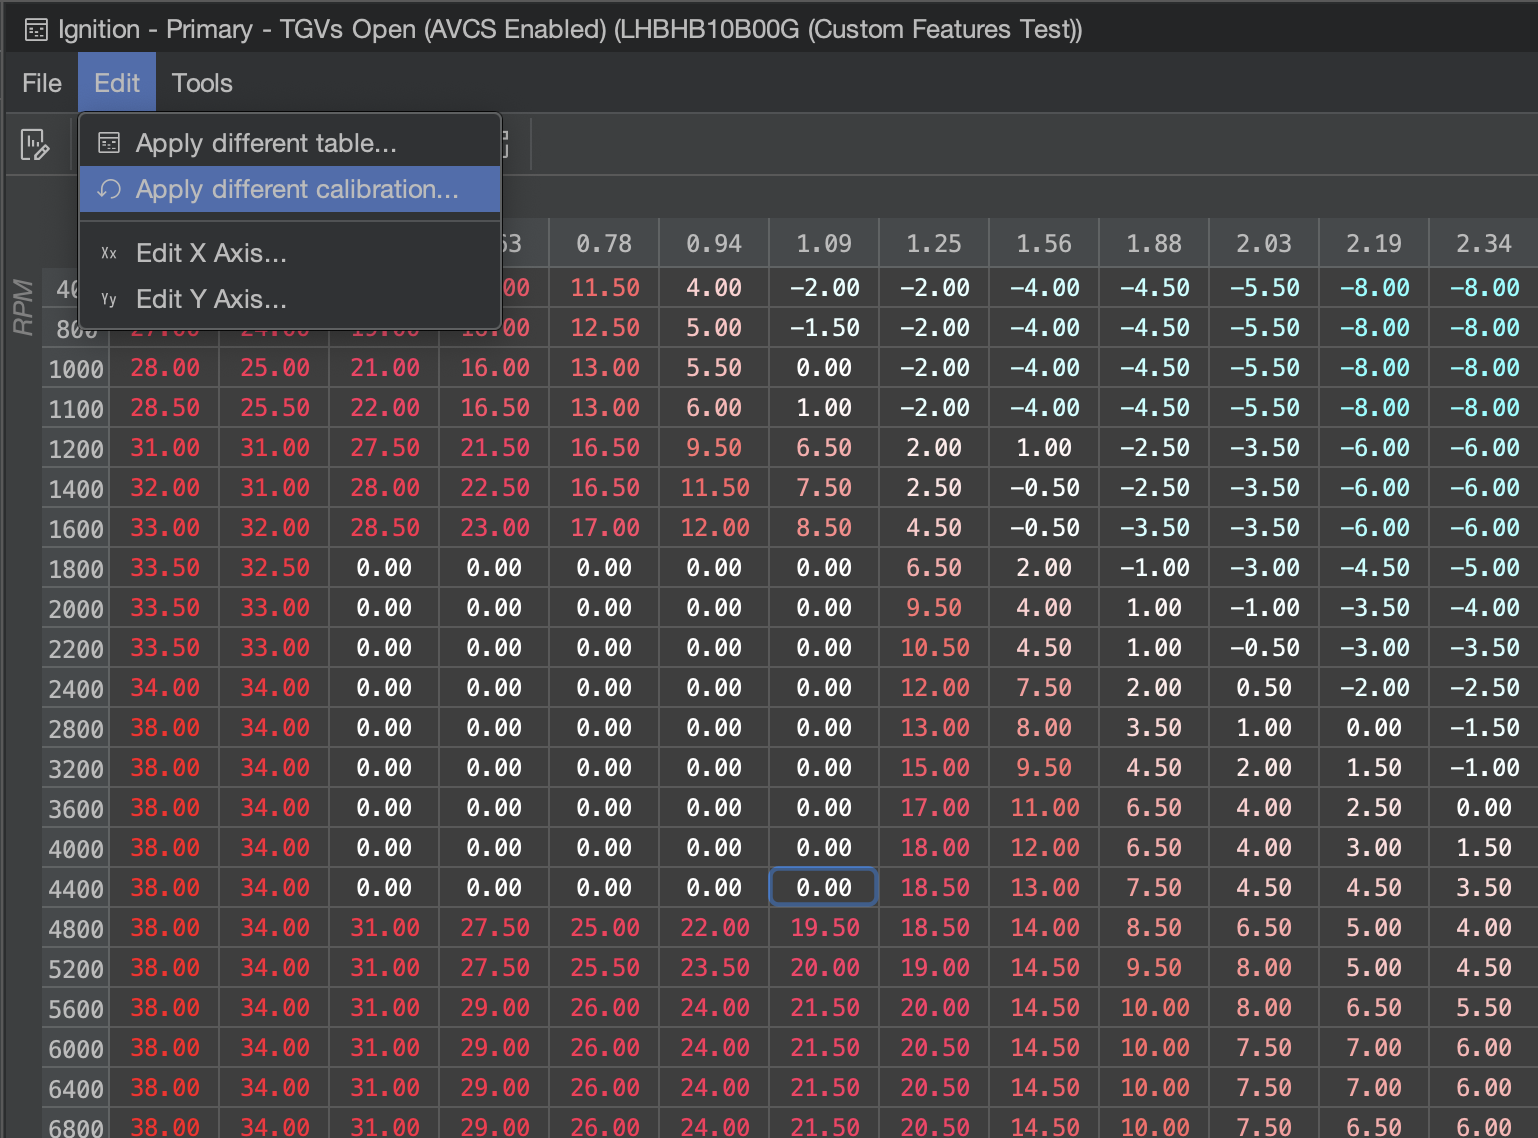
If you would like to revert your changes in the current calibration to another calibration, you can always Apply a different calibration by clicking Edit -> Apply different calibration...
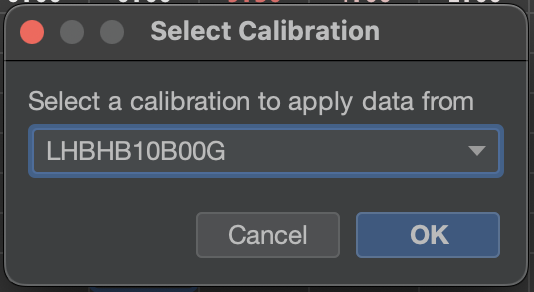
The default selection in the Select Calibration dialog box will always be the Base Calibration you set for the current calibration, if applicable, for faster reverting:
The calibration will be updated. Note that only selected cells will be changed. In this case, Ctrl/Cmd+A was used to select the entire table before the operation took place: