Flashing
Flashing a Calibration
Introduction
2023+ WRX MT Users
If you are using Atlas 2024.4 or earlier, recovery is not possible on these ECUs. Atlas 2025.1 and later resolves this issue upon first programming with the ECU.
In order for a calibration (tune) to be recognized completely by a vehicle, you need to transfer and permanently store it in the vehicle's flash memory, or ROM. For this to take place, you need to instruct Atlas to perform the "flashing" process with the vehicle. Flashing is an easy process, but it is possible for it to fail if careful steps are not taken. Please ensure the following is true for your scenario:
- The vehicle has ample battery capacity remaining to supply the electrical system in your vehicle for at least 30 minutes (we recommend turning off headlights/auxiliary electrical components) - don't try to flash a vehicle if it hasn't been started and driven for a long period of time (allowing the alternator time to charge the battery again).
- Your laptop/computer/etc. has ample battery capacity as well to avoid shutdown for at least 30 minutes.
- The vehicle is parked, stationary in a safe location such that anything to go wrong, recovery procedures can be run without interruption.
- Ideally, is connected to a high-amperage battery charger supplying the battery itself with current. Flashing will work without a battery charger connected, but we strongly recommend using one whenever possible to avoid flashing interruptions that can cause your ECU to enter recovery mode.
- The connection you can make with the OBDII port is firm and does not risk being accidentally unplugged with your position in the vehicle (i.e. shifting, moving around) and how it relates to any wires running to the OBDII port.
Vehicle Connection
To reflash, Atlas needs to be connected to the target vehicle. Please see our supported adapter page for full details.
Tactrix OpenPort 2.0 "Connection failed" Error

Sometimes, the OpenPort 2.0 can lose sync with the computer running Atlas. Make sure you always first connect the adapter to your computer running Atlas. Then, connect the OBD2 end of the Tactrix to the vehicle's OBD2 port, often located underneath the trim in the steering wheel area. Doing this in the reverse order can sometimes cause the Tactrix to incorrectly synchronize with your computer and Atlas.
Procedure
Atlas does not support reprogramming ECUs that are actively programmed by other 3rd-party, aftermarket tuning products in order to respect and honor their confidentiality agreements with their customers. Please "unmarry" the ECU from the aftermarket solution first, in order to return it to a factory state, before proceeding.
Make sure the vehicle is in its "Accessory Mode" mode, with the engine not running, but the gauges active. You may see a Check Engine light in this mode.
For key ignition vehicles, turn the key to the "ACC" position to enter this mode.
For push-to-start vehicles, push the ignition button twice with no pedal input (Clutch or Brakes) to enter this mode.
First, make sure you have selected your desired calibration to flash by selecting it in the Active Calibration dropdown menu in the upper-right part of Atlas. Then, click the Flash button,

After a brief period, you will be greeted with this prompt,
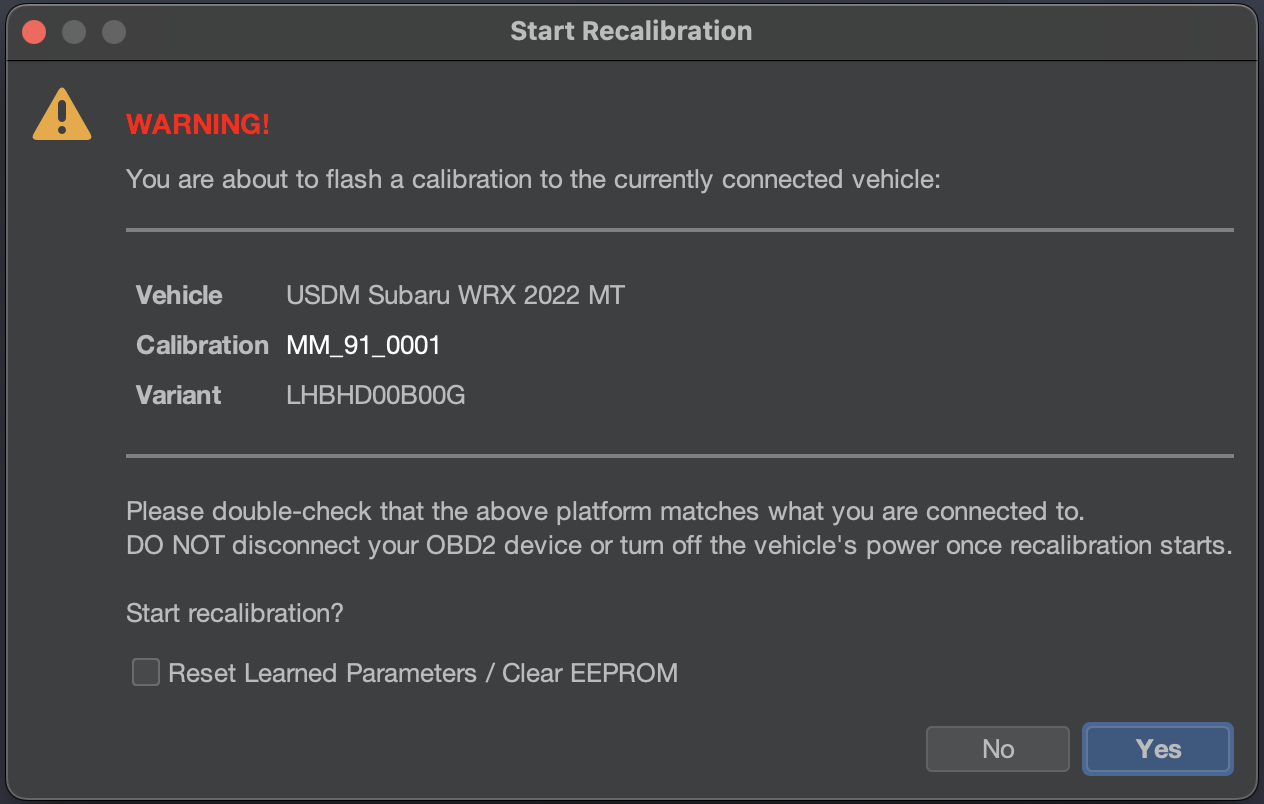
- Make sure the Calibration listed is the one you want to flash
- Make sure the Vehicle listed is the one you want to flash
- If you are flashing a new tune, we strongly recommend checking Reset Learned Parameters.
There is no turning back or any chance to interrupt the reprogramming once you click Yes. Make sure you are positive before continuing with reprogramming!
We recommend double-checking your sitting position, reducing any risk to an unplug scenario at this time, and laptop battery charge at this time. When you are ready, click Yes.
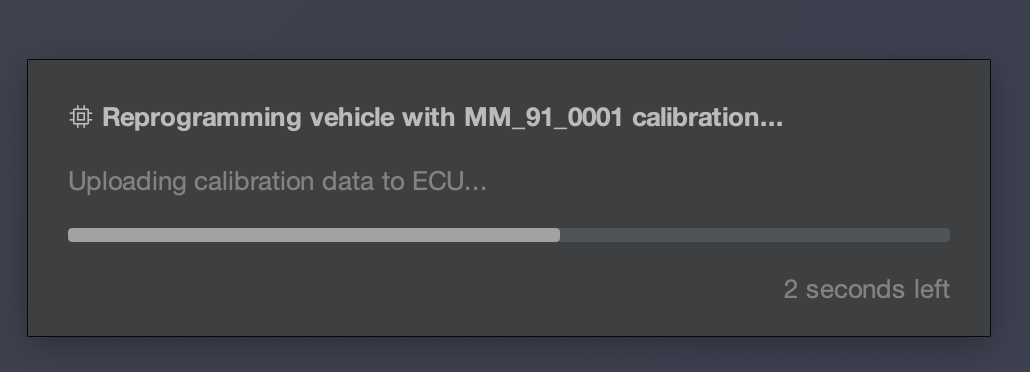
The flash data will be reprogrammed to the ECU. Typically, for fast flashes, this can take anywhere from 10 seconds to 5 minutes. Depending on your adapter's capabilities and speed, this may take longer. If necessary, Atlas will automatically enter Recovery Mode to recover the ECU with the selected calibration, and the process may start over.
Once the process completes, you will be greeted with the Reprogramming Complete screen:

Turn off the vehicle's ignition in order to completely shut down the vehicle. Click OK.
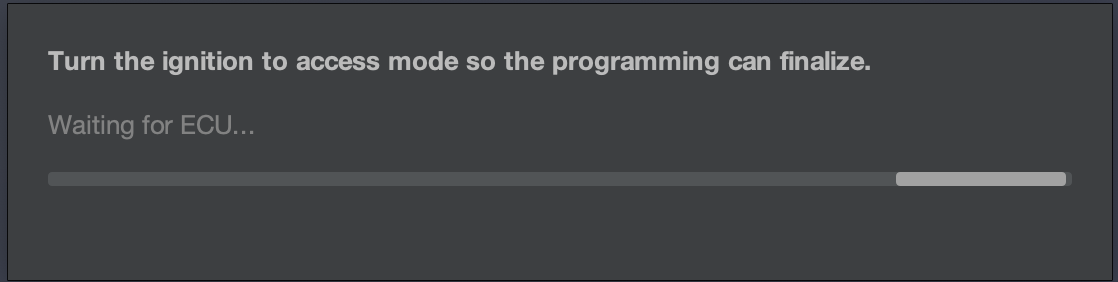
Atlas will now be waiting for the vehicle to return to its Access mode it was previously in. Allow the vehicle 10 seconds to fully shut down any internal electrical components that may still be in a flashing state, and return the vehicle to Accessory mode.
Atlas will then clear any non-persistent diagnostic trouble codes (DTC) that were accidentally tripped by any vehicle components during the flashing process, and the flashing process is complete!
Fast Flashing
Atlas supports "fast flashing" a vehicle, but only if the target ECU supports this. If the vehicle supports fast flashing, this will automatically take place.
Fast flashing, in most cases, will apply to any programming event with the vehicle, including first programming (sometimes referred to as "marriage").
Recovery Mode
For more details on following through with a recovery process, see our flash recovery procedures page.
Description
Most vehicles have a manner in which you can recover the ECU should the flashing be incomplete. For the Subaru WRX (2015+), for example, your bootloader (never reprogrammed by Atlas) has logic which runs on start that will attempt to see if the flash had been correctly programmed. It does this by looking at the first and last sections of your programmed ROM to see if certain data it expects to be present are in place. As flash data is sent in a ordered fashion, it is unlikely that both sections will ever be correct if the reprogramming is ever interrupted. If these sections are not correct, your ECU will enter recovery mode. In recovery mode, your ECU cannot operate the vehicle, but instead is waiting for a new ROM to be uploaded.
If, for example, power is lost to the ECU while flashing (low battery/etc.), this is the mode you will more than likely end up in. If Atlas fully supports your vehicle and your ECU also has a recovery mode that Atlas can interact with, Atlas will handle interacting with your ECU in this recovery mode.
Bricked ECUs
Please first see our flash recovery procedures page, as Atlas 2025.1 and later ships with a brick protection feature in most supported models. It is exceedingly difficult to truly brick an ECU with Atlas.
Please reach out to NAMR if your ECU is "bricked", or in other words it cannot communicate when recovery mode is expected. We offer a service to attempt recovery on capable ECUs in this more challenging state with specialized tooling at merely the cost of shipping as a courtesy to support our community.
Flash Recovery
Introduction
Description
Most vehicles have a manner in which you can recover the ECU should the flashing be incomplete. For the Subaru WRX (2015+), for example, your bootloader (never reprogrammed by Atlas) has logic which runs on start that will attempt to see if the flash had been correctly programmed. It does this by looking at the first and last sections of your programmed ROM to see if certain data it expects to be present are in place. As flash data is sent in a ordered fashion, it is unlikely that both sections will ever be correct if the reprogramming is ever interrupted. If these sections are not correct, your ECU will enter recovery mode. In recovery mode, your ECU cannot operate the vehicle, but instead is waiting for a new ROM to be uploaded.
If, for example, power is lost to the ECU while flashing (low battery/etc.), this is the mode you will more than likely end up in. If Atlas fully supports your vehicle and your ECU also has a recovery mode that Atlas can interact with, Atlas will handle interacting with your ECU in this recovery mode.
Bricked ECUs
Atlas Recovery Feature
Due to the nature of the Atlas brick protection feature, CAN bus devices on the car will not be able to communicate with the ECU and will likely light up your car's dashboard warning lights like a Christmas tree. This is fine, and should resolve after a complete flash and key cycle.
Atlas 2025.1 now ships with a brick protection feature. Due to its position within the bootloader, this feature is always accessible, even if the programming was incomplete or the tune contained bad code. Atlas will always try to reprogram the bootloader first, so even if it was your first time flashing the vehicle and it has ended up bricked, there is a good chance the feature is already installed.
To access this feature on an ECU that has been flashed previously by Atlas , first turn off the vehicle. Then, press and hold the Cruise Cancel switch on your steering wheel. Wait approximately 30 seconds. While holding this button, enter accessory mode:
- For key ignition vehicles, turn the key to the "ACC" position to enter this mode.
- For push-to-start vehicles, push the ignition button twice with no pedal input (Clutch or Brakes) to enter this mode.
The Cruise Cancel button can now be released.
This will activate an Atlas recovery feature in your ECU's bootloader, and the ECU will immediately enter recovery mode. At this point, you can follow the procedures in this document. This feature can be activated at any time under any circumstances as long as the vehicle has battery power. To cancel this recovery mode if the ECU is not bricked, simply key cycle the car.
If the above does not work and you have flashed the ECU with Atlas before, it is possible either the bootloader is truly bricked (see Unusual Circumstances).
Unusual Circumstances
Please reach out to NAMR if your ECU is "bricked", or in other words it cannot communicate when recovery mode is expected. We offer a service to attempt recovery on capable ECUs in this more challenging state with specialized tooling at merely the cost of shipping as a courtesy to support our community.
Procedure
Make sure the vehicle is in its "Accessory Mode" mode, with the engine not running, but the gauges active. You may see a Check Engine light in this mode.
For key ignition vehicles, turn the key to the "ACC" position to enter this mode.
For push-to-start vehicles, push the ignition button twice with no pedal input (Clutch or Brakes) to enter this mode.
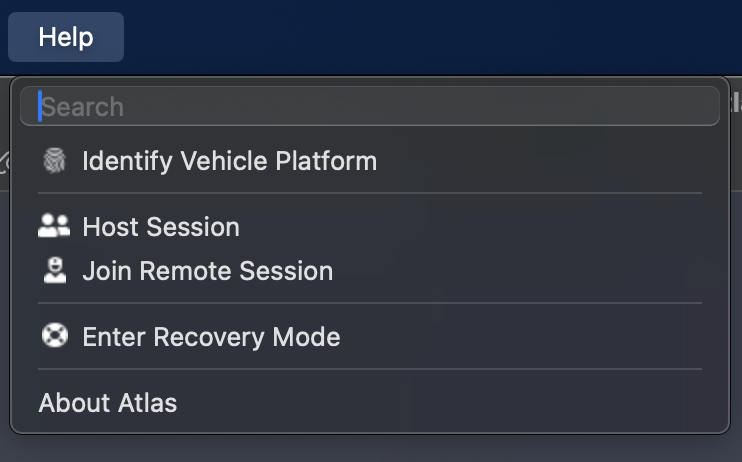
To enter Recovery Mode in Atlas, use the main menu to click Help -> Enter Recovery Mode.
You will be asked what vehicle is being recovered; select it from the list and click OK,
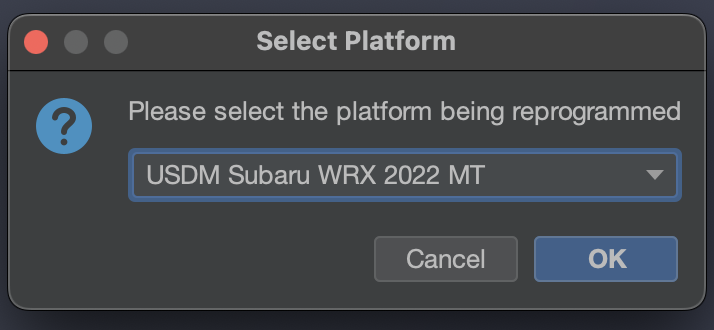
First, make sure you have selected your desired calibration to flash by selecting it in the Active Calibration dropdown menu in the upper-right part of Atlas. Then, click the Flash button,
You may be asked again which vehicle is being recovered; select the vehicle again from the list and click OK.
After a brief period, you will be greeted with this prompt,
- Make sure the Calibration listed is the one you want to flash
- Make sure the Vehicle listed is the one you want to flash
- If you are flashing a new tune, we strongly recommend checking Reset Learned Parameters.
There is no turning back or any chance to interrupt the reprogramming once you click Yes. Make sure you are positive before continuing with reprogramming!
We recommend double-checking your sitting position, reducing any risk to an unplug scenario at this time, and laptop battery charge at this time. When you are ready, click Yes.
The flash data will be reprogrammed to the ECU. Typically, for fast flashes, this can take anywhere from 10 seconds to 5 minutes. Depending on your adapter's capabilities and speed, this may take longer. If necessary, Atlas will automatically enter Recovery Mode to recover the ECU with the selected calibration, and the process may start over.
Once the process completes, you will be greeted with the Reprogramming Complete screen:
Turn off the vehicle's ignition in order to completely shut down the vehicle. Click OK.
Atlas will now be waiting for the vehicle to return to its Accessory mode it was previously in. Allow the vehicle 10 seconds to fully shut down any internal electrical components that may still be in a flashing state, using the ignition key or push-to-start button, once again return the vehicle to Accessory mode.
Atlas will then clear any non-persistent diagnostic trouble codes (DTC) that were accidentally tripped by any vehicle components during the flashing process, and the flashing process is complete!
Cloning an ECU
Introduction
In order to avoid risking damaging or "bricking" your OEM ECU, you may instead choose to clone your OEM ECU to another, spare ECU that you have purchased. However, you will run into issues with this without cloning the ECU, as the OEM ECU in your vehicle has keys that permit the ECU to authorize with your electrical system. One of these keys is the key used for immobilizer authorization. Without at least these keys in agreement, the vehicle will not start. This documentation page assumes you have an OEM ECU that is correctly trained/paired to the vehicle from factory (or a dealership/service specialist) as a cloning source, and a spare ECU to clone to.
Cloning an ECU involves downloading the region of memory in your ECU that holds these authorization keys. This section is smaller than and separate from your calibration (or tune) and is called EEPROM. You can download an EEPROM file and save it for later, or upload it to another ECU immediately after downloading it from the factory ECU.
Atlas does not support cloning or reprogramming ECUs that are actively programmed by other 3rd-party, aftermarket tuning products in order to respect and honor their confidentiality agreements with their customers. Please reach out to the vendors supplying those products to clone and support those modified ECUs, or "unmarry" the ECU from the aftermarket solution first before proceeding.
Cloning is relatively easy, but please ensure the following is true for your scenario:
- The vehicle has ample battery capacity remaining to supply the electrical system in your vehicle for at least 30 minutes (we recommend turning off headlights/auxiliary electrical components) - don't try to flash a vehicle if it hasn't been started and driven for a long period of time (allowing the alternator time to charge the battery again).
- Your laptop/computer/etc. has ample battery capacity as well to avoid shutdown for at least 30 minutes.
- The vehicle is parked, stationary in a safe location such that anything to go wrong, recovery procedures can be run without interruption.
- Ideally, is connected to a high-amperage battery charger supplying the battery itself with current. Flashing will work without a battery charger connected, but we strongly recommend using one whenever possible to avoid flashing interruptions that can cause your ECU to enter recovery mode.
- The connection you can make with the OBDII port is firm and does not risk being accidentally unplugged with your position in the vehicle (i.e. shifting, moving around) and how it relates to any wires running to the OBDII port.
Vehicle Connection
To reflash, Atlas needs to be connected to the target vehicle. Please see our supported adapter page for full details.
Tactrix OpenPort 2.0 "Connection failed" Error
Sometimes, the OpenPort 2.0 can lose sync with the computer running Atlas. Make sure you always first connect the adapter to your computer running Atlas. Then, connect the OBD2 end of the Tactrix to the vehicle's OBD2 port, often located underneath the trim in the steering wheel area. Doing this in the reverse order can sometimes cause the Tactrix to incorrectly synchronize with your computer and Atlas.
Step 1: Downloading EEPROM
Make sure the vehicle is in its "Accessory Mode" mode, with the engine not running, but the gauges active. You may see a Check Engine light in this mode.
For key ignition vehicles, turn the key to the "ACC" position to enter this mode.
For push-to-start vehicles, push the ignition button twice to enter this mode.
First, ensure the OEM ECU is connected to the vehicle. If it is not, disconnect the battery before replacing and installing the OEM ECU. Reconnect the battery after physically reinstalling and fully reconnecting the ECU.
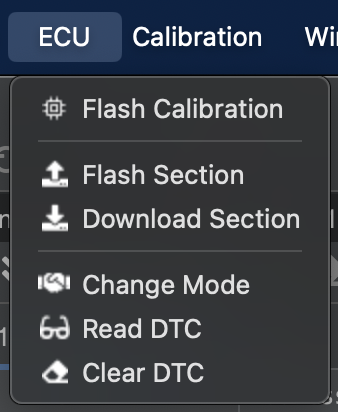
Then, using the main menu in Atlas, click ECU -> Download Section:
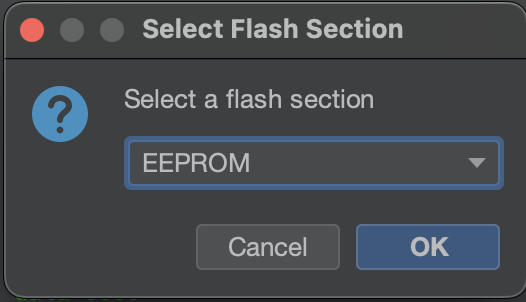
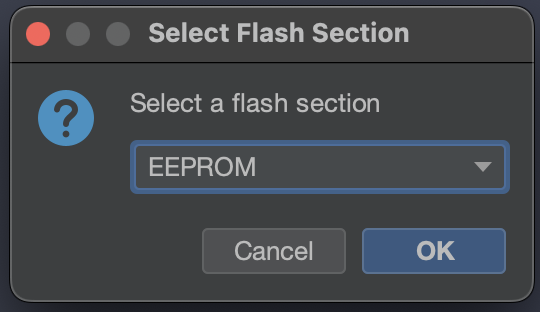
You will be asked which section is being downloaded. Select EEPROM, and click OK:
The EEPROM will be downloaded from the ECU, please wait for this to finish.

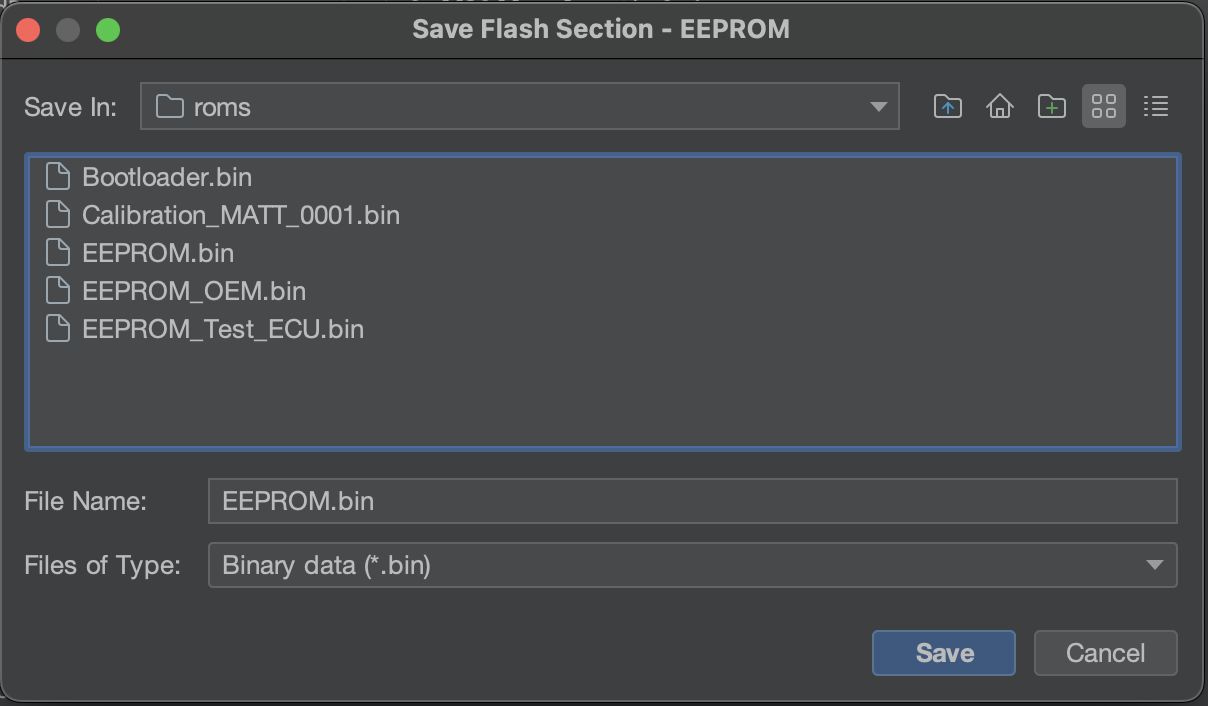
When the process has completed, save the downloaded binary data to a file on your computer:
Step 2: Uploading EEPROM
Make sure the vehicle is in its "Accessory Mode" mode, with the engine not running, but the gauges active. You may see a Check Engine light in this mode.
For key ignition vehicles, turn the key to the "ACC" position to enter this mode.
For push-to-start vehicles, push the ignition button twice to enter this mode.
Ensure the spare ECU is connected to the vehicle. Disconnect the battery before replacing and installing the spare ECU. Reconnect the battery after physically reinstalling and reconnecting the spare ECU.
Then, using the main menu in Atlas, click ECU -> Flash Section:

Select an EEPROM binary file that was previously downloaded from another ECU:

You will be asked which section is being uploaded. Select EEPROM, and click OK:
The EEPROM will be uploaded to the ECU. Wait for the process to finish:

Once the process completes, you will be greeted with the Upload Complete screen:
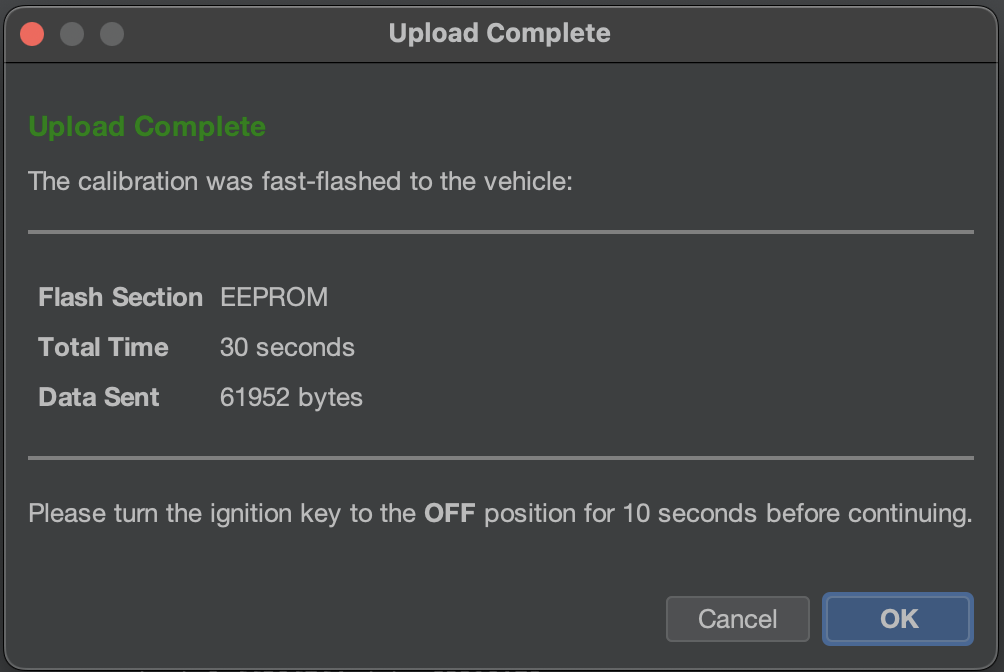
Turn off the vehicle's ignition in order to completely shut down the vehicle. Click OK.
Atlas will now be waiting for the vehicle to return to its Accessory mode it was previously in. Allow the vehicle 10 seconds to fully shut down any internal electrical components that may still be in a flashing state, and return the vehicle to Accessory mode.
Picking a Calibration to Log and Flash
Atlas and OEM Calibrations
Officially Supported Calibrations
What is officially supported?
Atlas provides at least one unmodified OEM calibration for every supported vehicle. Atlas does not ship with any pre-loaded, modified ("off the shelf") maps. For these off-the-shelf calibrations, please check in with our community for community-developed OTS maps; Discord is a great place to ask. They are typically well-tested and will be a great platform for you to start from.
In order to make the process of development easier, Atlas only supports the latest calibration from the manufacturer for each particular vehicle configuration. This is the standard procedure for most modern tuning softwares. For example, if your vehicle is a 2022 USDM Subaru WRX MT, there will be a specific calibration that represents the most up-to-date ROM that exists for your ECU, and this is the calibration that Atlas will provide and support.
What if the OEM releases a new calibration?
As new calibrations are released by the OEM and NAMR is made aware of these, we update Atlas to support them and release new versions of the software package accordingly. As this takes place, older calibrations are removed from the pre-loaded list to deter our end-users from programming these out-of-date calibrations. This same process takes place in the OEM software packages provided to dealerships; as new bundles are made available to dealerships, older calibrations are removed from rotation by the OEM.
However, any prior supported calibrations will continue to be supported for backwards-compatibility for flashing and logging alike. Our official stance is that when you find yourself in this situation, you should promptly rebase your tune onto the latest calibration available from the OEM. We strongly encourage this, as newer calibrations quite often involve recalls for various nuisances and potentially serious safety issues that have been identified.
If you live in the United States, you can typically see what issues are being addressed in newly released calibrations by searching for safety bulletins on the NHTSA website: https://www.nhtsa.gov/recalls.
Older Calibrations
What makes a calibration "old"?
As OEMs identify issues in their released calibrations, their corresponding software vendors supply updated calibrations to both the factory and the dealership network through internal processes. This activity from the OEM is typically seen as frequently as a quarterly basis and will even take place even after a particular model year of a vehicle has been retired, as deemed necessary by the feedback the OEM is receiving on their active calibrations.
What this means for you is your target vehicle may be running a calibration that - even if tuned - is presently out-of-date. While Atlas will recognize this calibration on the vehicle, it is likely that if it is old and out-of-date (super-ceded by a newer calibration), it is unsupported for both logging and flashing.
What do I do if my vehicle is on an unsupported calibration?
Although your calibration may be presently unsupported by Atlas, that doesn't mean you can't replace it with a newer calibration so you can log and tune your supported vehicle.
If you'd like to keep a copy of your old calibration for any reason, see our page on Cloning an ECU. You won't be cloning the calibration to another ECU, in this case, but that documentation page covers downloading it so you can preserve it somewhere if you ever want to flash it back to the ECU for any reason. It is worthwhile stating that this step is not strictly required to tune your car with Atlas.
Then, you can start by flashing the latest calibration for your car to the vehicle with Atlas. This will give you the same result as if you had dropped your car off at the dealership for recall service on the ECU. Once you're on the latest OEM calibration, you're all set to start logging with Atlas if you would like to collect base-line logs. From there, we recommend copying and modifying your base calibration to create your own tune, so the pre-shipped, latest OEM calibration remains unmodified if you ever need it.
Why does Atlas not support these?
When OEMs release new calibrations, we often see that the offsets for ROM elements such as tables, parameters, and so forth will change in unpredictable ways. Although the reason isn't significant to us, this could possibly be due to the unique development workflows each OEM implements to release any given calibration.
Atlas has an extensive set of modern tools, workflows, and automations built in to the software that enable the development team at NAMR to quickly adopt support of new calibrations by generating definitions against an unknown, new ROM file. However, nothing is perfect, and we take our quality assurance of definition accuracy very seriously. It is our policy that we will invest our time in new calibrations, but we do not extend support for calibrations that pre-date the initial support date of a given vehicle model on Atlas.
This means: if Atlas supports a 2022 USDM WRX MT on July 1st, 2024, any calibrations that were released prior to the calibration that was the latest as of that date are unsupported.
It really boils down to time and alignment with OEM to uphold safety and emissions standards. It takes time for us to bring in a new calibration, and we can't guarantee a uniform experience across our supported calibrations if we spread our development team thinly over several definitions for every single model. Having one supported calibration per model streamlines our development workflow so we can keep developing great features for our community.